Wednesday, January 4, 2012

Wednesday We: Winter Break Ends

Yesterday was the last day of winter break. I took the entire two and a half weeks off with the kids, which was lovely. Seth had the time off as well. Or, more accurately, I should say he was free of scheduled commitments, as he spent most of his "vacation" crunching numbers and writing. (In case I haven't mentioned it before, he's a professor of political science.)

We had a nice break, with a four-day trip to Los Angeles to see family and friends, Hanukkah celebrations in Los Angeles and back at home, and our first Christmas dinner ever thanks to an invitation from old friends who recently moved to our neck of the woods. We rented lots of movies and saw "The Adventures of Tintin" in the theater, read, played games, made art, had playdates, baked, cooked, and took on a lot of major cleaning and purging projects.

We celebrated the last day of vacation by having lunch out at Sadie's favorite Chinese restaurant, recorded for posterity in this iPhone egg drop soup photo:

Note: Sadie's lunch did not come with soup; she stole mine.

The kids also spent hours today with their Ed Emberley book drawing pirates and penguins and pandas. Clearly, they were stuck on "P"s! I used to draw from Ed Emberley books when I was a kid and it's neat to see the next generation doing the same thing. 

The evening was all about the Iowa caucuses. Seth follows major election events closely for his research and teaching, and can, like tonight, usually be found following such events sitting on the couch with the TV on, his laptop on his lap, and his iPhone in his hand. It's so funny how the kids get sucked in as well. When I tucked Eli into bed he wanted me to come back upstairs in ten minutes to let him know what percentage of the votes were in yet and who was ahead.  

I think today is going to be a little hard for all of us as we return to reality, but I'm sure that we'll have settled back into the routine within a day or two.

Stay tuned for tomorrow's first Thrifty Thursday, when I will dig back into my stash of products and start using up some of the stuff I can't bear to part with.


Tuesday, January 3, 2012

Tuesday Technique: Skewer It

Can you believe it? I am actually back today. Not only that, but I now have a fun blog header (check it out!) and this is my fourth blog post in five days. Whoa! I hardly recognize myself! :)

This is my first Tuesday post of 2012. If you remember way back to yesterday, I outlined my weekday blogging plan, which included sharing a tip or technique on Tuesdays. Enter National Skewer Day (I just made that up in case any of you are running off to Google it)...

Wooden skewers are my new go-to supply. "Why?" you might ask. Well, flags are one of the current popular trends in scrapbooking. Several manufacturers are producing pre-made flags with toothpicks, like October Afternoon's Little Flyers (Farmhouse collection shown here):


or these Toothpick Flags from Pebbles (With Love collection shown here):


I've also seen several layouts using stick pins in place of toothpicks, which looks pretty cool (I jumped on board that trend as well). 

While I love using small flags, sometimes I crave an embellishment on a grander scale. I happened to be pondering this last summer...when we were grilling a lot of shrimp...on skewers...which led to my first use of giant flags:

Supplies: Cardstock (Bazzill Basics) + Patterned Paper (October Afternoon) + Chipboard (American Crafts) + Tin Pin (October Afternoon) + Spray Ink (October Afternoon) + Baker's Twine (Divine Twine) + Skewers
 
I created the flags by cutting strips of patterned paper, notching the ends, and then wrapping the straight sides of the flags around the skewers and gluing them in place. I cut the pointed tips off of the skewers with my sharp craft scissors and also used my scissors to trim the skewers to different lengths. Once made and tied together into a simple bouquet, the flags made for a fun summertime embellishment on this layout. 

I returned to this technique a few months later with a layout that made it into my top ten layouts of 2011:


Supplies: Cardstock (Bazzill Basics) + Patterned Paper (October Afternoon) + Stickers (October Afternoon) + Baker's Twine (Divine Twine) + Fonts (Typenoksidi, Lobster 1.4) + Skewers
On this layout I used the skewers with premade flag sticker embellishments (the Little Flyers referenced above - these are from October Afternoon's Sidewalks collection). I will admit that it does take a little bit of manipulation and a lot of glue dots to get the flag bouquet just right, but it doesn't take more than 5-10 minutes total. 

I recently went mid-length with skewers (halfway between tree and toothpick) on this birthday card:


Supplies: Cardstock (Bazzill Basics) + Patterned Paper (Echo Park) + Stickers (Echo Park) + Baker's Twine (Divine Twine) + Skewers
Now I am (not-so-) patiently waiting for the manufacturers to get on board with my trend so that I can stop raiding my kitchen for embellishments! :) A girl can hope, right? (Or maybe there's a company I don't know of already doing this? If so, let me know!)

If you create anything with skewers, link me up! I'd love to see whatever you do! 


Monday, January 2, 2012

The New and Improved "Right Side Up"

(First, an explanation of the new and improved "Right Side Up." Then, below the dotted line, the first official Monday post of 2012.)

I will freely admit that I have been a bad blogger. I started my blog when Sadie was three and Eli was in kindergarten. At that time, I was also working twenty-plus hours a week as an educational consultant, and had just started to find my way in the scrapbook industry. To say I was busy was an understatement. I named my blog "Right Side Up" because that was my goal at a time when everything felt upside down.

Six months later, however, a new kind of busy blew the old kind of busy out of the water when I went back to work full time in the summer of 2008 working year-round as a curriculum coordinator for my local school district. Sadie was three and Eli was in first grade. I was trying to be a good mom, meet all of my work obligations, and still keep a hand in the scrapbook industry. So...the blog became an afterthought.

Fast-forward to 2012. I'm back to working part-time as an educational consultant. Now, however, on days that I'm not working, both my kids are in school, so there's time for me to breathe a bit. Okay, so I apparently don't know how to breathe a bit, since now that I'm working less I've taken on additional scrapbook commitments as well as volunteer commitments at my kids' school. I keep trying to find a better balance, but true work-life balance is pretty elusive! I must be getting closer, though, since I seem to be finding time to do nearly everything I need to do and most of what I want to do as well. (Except for that pesky exercise thing...)

Now that you know the history of my poor, neglected blog, let's move on to the future. I've created a set weekday blog routine, which will help me to post and share life/layouts/cards/projects regularly. Please know that this blog is a work in progress, and I'm giving myself permission to start my weekly routine without yet having a flashy banner at the top or a cooler blog design. I fully intend to add an actual banner sometime this week and will update the design when I find the time and inspiration to do so.

So, without further ado, here's what you can expect to see from me each week:

Monday: Makings
On Mondays I'll share something I've made recently. Some weeks this will be a layout, other weeks it will be a card or a home decor project.
    
Tuesday: Tips & Techniques
Every Tuesday I'll share something cool I've learned, a new way to use something, or a helpful hint. Be prepared: this might be Silhouette-Cameo-heavy at first, as I'm still very much in the honeymoon phase with my week-and-a-half-old toy. :) I do not claim to be an expert at anything, but will share things that I've found helpful or cool.

Wednesday: We
On Wednesdays you'll get a glimpse into my family's life, whether it's something funny one of my kids said or a recipe I want to share or a summary of a trip we've taken, or...(you get the idea). This might or might not be accompanied by a layout. 

Thursday: Thrifty Thursday
I have an embarrassingly large stash of older products that I still love and can't bear to part with, but never use. On Thursdays you'll see me digging into that stash to make a card or a layout or some other project.

Friday: Fabulous Find(s)

On Fridays I'll share something fabulous I've found. It might be a scrapbooker whose work I love or an inspiration piece or a website or a product.

**********************************************************************************************

Okay, now on to the first "Monday Makings" post:

Today is the launch of the January gallery at Write.Click.Scrapbook. The theme this month is "Today." You'll see that everyone interpreted that a little differently. I took this as an opportunity to document bringing my 6-year-old daughter into the family tradition of making Kiva loans. (It was also an opportunity for me to use my Silhouette Cameo...heavily):


Supplies: Cardstock (Bazzill Basics) + Patterned Paper (map and cream grid: October Afternoon, ledger: Scenic Route, pink: Crate Paper, green woodgrain: American Crafts Amy Tangerine, blue grid: Studio Calico) + Chipboard (Cosmo Cricket) + Badge (Ormolu) + Fabric Tab (Ormolu) + Font (Lobster 1.4) + Silhouette Shapes (file folder, silhouette, globe, banner)


Two of the elements on this page were ways for me to test out different ways of using the Cameo. 

Let's start with the globe. I started by sizing the globe to 4" in diameter and cut it out of the green woodgrain paper. Next, I used the offset feature in the Silhouette software to create a circle to place behind the globe. Once I'd created the circle, I resized it to be the same size as the globe itself, making the perfect ocean background I was looking for. After I'd cut the offset shape from blue grid paper, I used foam adhesive to attach the two layers together. This created a cool shadow effect with the land part of the globe raised above the ocean part.

The second element I played around with was the banner. First, I cut the banner out of black cardstock. Next, I did my first welded cut. I wrote out the three words and welded the letters in each word together. After each word was welded, I grouped the three words together as one shape, resized them to fit inside the banner shape, and cut them out of the same ledger paper I'd used for the title file folder. Here's where I learned two things: 1) I had sized the words the same length as the banner, but forgot that the "V" was cut out of it, so I had to turn the "the" sideways to make it fit (which made it look cooler, at least in my opinion, so it wasn't such a bad error); and 2) I realized that I could have avoided the error by making the words a cut-out within the banner shape, cutting that out of black cardstock, and then cutting out a solid same-sized banner shape from the ledger paper and gluing it to the back of the black banner shape with the cut-out words. I'm glad I didn't figure out lesson #2 earlier, though, as I do like that sideways word, which would never have happened if I had already learned lesson #2.

So...there you have it, my first post of 2012. If anyone is actually reading this, please feel free to leave a comment if there's anything specific you'd like to see me post about this year and I'll do my best to incorporate requests in my 2012 blogging. 


Hope your 2012 is off to a good start!


Saturday, December 31, 2011

New Year's Eve + Silhouette Cameo + Bella Blvd

I got a Silhouette Cameo for Hanukkah. Seth coordinated the effort amongst family members and everyone contributed towards it. I couldn't be happier (translation: obsessed) with my gift. I keep trying new things and am so impressed with what this machine can do! 

Enter New Year's Eve. Seth and I decided rather last-minute to invite a couple of friends over for a New Year's Eve get-together. For him, it was an opportunity to try out recipes from his Hannukah gift: the Momofuku Milk Bar cookbook. For me, it was an opportunity to start madly cutting things out (and to taste things from the Momofuku Milk Bar cookbook). 

As I started to think about how to decorate for the party, I remembered we had an old multi-photo frame sitting around that we had never put to use. I dug the frame out of the closet and made a very simple project, filling two of the photo slots with patterned paper from Bella Blvd's Socialite line (this is an older line, from 2010) and the other two slots with words and numbers printed in colored ink on white cardstock. I cut a couple of patterned paper labels with the Cameo and added them to the text blocks before putting them in the frame. I thought it turned out kind of cute and festive:


However, when I put the frame on the sideboard it looked, well, lonely. So...I made a coordinating banner to hang on the mirror above it:


As I admired my handiwork and marveled at what I could do with my new toy, I realized that the frame was sort of low and so I clearly needed to add something with height to the sideboard. Enter the New Year's Eve bouquet (cardstock + Bella Blvd Socialite + Cameo + skewers + adhesive):


This was my first time using the offset feature in the Silhouette software. With one click you can create a background shape for the shape(s) you are cutting. We all know how much I love putting borders on layouts, and I'm so happy that I've discovered the Silhouette equivalent! I put the offset shapes in a separate document and cut out two copies using black cardstock. I glued the patterned paper shapes to the offset shapes, and then sandwiched two matching shapes together with a skewer in between, making the flowers double-sided (I put a different patterned paper on each side) and hiding the end of the skewer inside the flower. Then it was just a matter of filling my vase with pebbles and sticking the flowers and banners in to create the bouquet.

As if all of this creating and cutting wasn't enough, I decided that the cool gift-every-hour countdown project I'd seen on Pinterest and been planning on doing could also benefit from a little Cameo action:


We went to the dollar store and bought little gifts for the kids coming to the party (things like jewelry, stencils, candy, etc.) and filled each hour's bag with a different gift. So...at 7:00 the kids will gather to open the first bag and each of them will get one of the gifts inside the bag. At 8:00 they'll open the next bag, etc. I don't know how many will make it to midnight, but I did create bags for 7:00 to midnight since I am anticipating that the Momofuku Milk Bar desserts might create a lasting sugar high. :) 

Each bag has a slightly different topper and tag and I added baker's twine from The Twinery and Divine Twine in colors that coordinate with the Bella Blvd Socialite paper.

Want to see how the whole "holidayscape" comes together? Here you go:


If you have any questions about how I made anything in the photo above, please leave a comment here and I'll answer any questions tomorrow.

Remember that Monday is the start of the new-and-improved Right Side Up, so be sure to check back then to see what I have in store for 2012.
Best wishes to you and yours for a happy and healthy New Year!


Friday, December 30, 2011

Top Ten of 2011

Every year, I post my top ten layouts of the year at the end of December. Today's post is just that - ten layouts that I want to keep looking at and reading again and again. As always, they are in no particular order. There is one layout I'd have included here that's out for publication, so keep watching Scrapbooks, Etc. for that one. ;)

1. I'll start with a layout that I've never posted online before. I did this one for the September "Design Play" issue of Masterful Scrapbook Design. It features products from October Afternoon's Sidewalks line. I love this one because I love the photo, the emotion it evokes for me, and the pops of bright color against the black background.


2. Sticking with black and October Afternoon Sidewalks, here's a layout I did about our wedding, reflecting back fourteen years later. I love this one because of the photo and the journaling, but also because I adore the giant banner flags (this was the second layout I did that on - I like this one much better than the first one). Kitchen skewers + stickers + baker's twine = easy and fun embellishment.


3. Next up is another layout I haven't posted anywhere before. This one was so different for me, but I love how it turned out! I decided to create a layout that would dig into my stash, so dig I did! I kept adding and adding and adding things, so it's significantly more product-heavy than most of my layouts, but, hey, variety's a good thing, right? ;) Patterned papers are from Cosmo Cricket, My Mind's Eye, and October Afternoon; the stickers are from Studio Calico, My Mind's Eye, and October Afternoon; the badges are from Ormolu and October Afternoon, and the fabric tab and journaling card (digital - I printed it out) are also Ormolu.


4. Okay, okay, I get it, enough of the black backgrounds, already. Moving on to white...This layout was one of the four I sent in when I applied for the Bella Blvd design team. I love all the bright colors, and that this rockstar layout combines products from a Halloween line, a Christmas line, and a sports line. 


5. Sticking with a white background, and Sadie, here's a layout I did last week, my first layout using my brand-new Silhouette CAMEO (to which I am now addicted). The first thing I cut was a set of mustaches for Sadie to play with. She was hamming it up and trying them on so I snapped pics and then cut smaller mustaches for the layout as well as an airplane ticket. Bonus? The extra small mustaches were sized just right for American Girl dolls. :) All of the non-Silhouette products here are from October Afternoon's Boarding Pass line (except the telephone, which is October Afternoon Five & Dime), which I hadn't originally thought of as a spy-themed line, but it works, doesn't it? I think I need to move the mustaches on the toothpicks so that the left edge of each mustache is attached to the toothpick, rather than the center of the mustaches. Funny how you have to post something online sometimes to figure out what's wrong with it!


6. More Sadie and a white background next...this one I did for the Bella Blvd December newsletter. I went crazy with punches and it turned out really fun!


7. Family history next. This may be one of my all-time favorite layouts ever. I did this one with October Afternoon Boarding Pass. I love that I was able to resize scans of my grandfather's family passport and embarkation cards to include on this layout.


8. Here's another October Afternoon Boarding Pass layout - this one was for the booth at CHA last summer. I love how the background paper acts as an embellishment - I didn't have to do much else to finish out this layout.


9. Here's another "busting into my stash" layout. I have been hanging onto these cute animals from Cosmo Cricket for far too long. I combined them with some October Afternoon Farmhouse, Amy Tangerine Thickers from American Crafts, and a tiny heart sticker from Jillibean soup. Love the cute animals, love the cute kids, love how the new and old products combined so well!


10. Last, but not least, is a layout I made with a very special photo I scanned while visiting my parents. This one uses October Afternoon Farmhouse.


In looking back at my layouts from this year, I am sensing some trends:

  • I still love white/black/kraft backgrounds.

  • I have made a shift back towards computer-generated, rather than handwritten, journaling. I'm not sure how I feel about that. I do love seeing my writing on my layouts, but I've been doing more clean-lined layouts this year (I used to do a lot of torn edges), and the printed journaling seems to align better design-wise with that for me. I did just handwrite on a layout I did today, so I think I'm going to let this be and just go with whatever I feel the design calls for.

  • I'm using a lot of embellishments on sticks. Skewers and toothpicks are always on my desk these days.
Okay, folks, there you have it: my ten favorite layouts of 2011 and my thoughts on how my style has both stayed the same and shifted a bit.

Stay tuned, as after years of being a horribly irregular blogger, I have cooked up a Monday through Friday schedule that makes sense to me and won't be too taxing for me to keep up with. 

I'll be back tomorrow to share my Silhouette CAMEO-cut New Year's decor, and then Monday will be the start of the new-and-improved Right Side Up.

I'd love to hear from any of you who are also posting your top ten (link me up in the comments here, please!) and from any of you who are doing some year-end reflecting on your style.


Thursday, December 1, 2011

Going Places Today

Yup. You're going to have to do a little cyber-travel today. Check out my layout below and then click on over to the Write.Click.Scrapbook. blog and the October Afternoon blog. That's all I'm saying. Nothing like a good mystery, right? ;)


Happy December!
 

Saturday, November 19, 2011

Books for Kids

While I usually blog about my life in the paper crafting world, many of you know that my "real" job is as an educator. I taught high school social studies and language arts and have cycled through three different of out-of-the-classroom jobs since then, working in positions that combine instructional coaching, curriculum development, and professional development. 

It's been interesting to combine my parenting with my background in education. With the current heavy nationwide testing emphasis on reading, writing, and math, I am hugely bothered by how that impacts the amount of time spent in elementary schools on social studies and science. I'm also bothered by how much of the math instruction ignores the fun aspect of math. On a positive note, I am encouraged by what is likely to be the impact of the new Common Core State Standards, which call for a shift in the amount of time spent reading narrative vs. informational text. I think the shift towards a more balanced ratio of narrative to informational text is a good thing (a very good thing), but we're still in the early stages of the rollout of these new standards and the shift to more informational text is likely to be slow in coming.  

Given all of what I've described above, I've tried hard as a parent to seek out good social studies, science, and math books that are fun and informative/interesting. I'm going to be looking for some new books for the kids for the holidays this year, but thought I'd share five of our "greatest hits" - the books my kids turn to again and again that have helped them to develop a love of learning and a curiosity about the world around them.


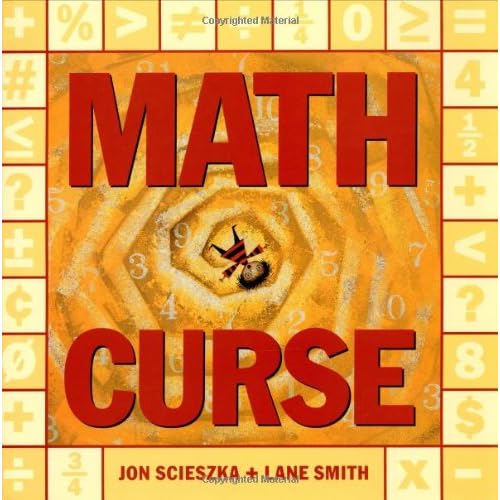
1. The Math Curse by Jon Scieszka + Lane Smith


Whether you read this to your kids or they read it themselves, math becomes fun, funny, and a natural part of the world that surrounds us every minute of every day. My kids stop to laugh, stop to try to figure out some of the problems posed in the book, and start to see and work through math problems they encounter in their everyday life.


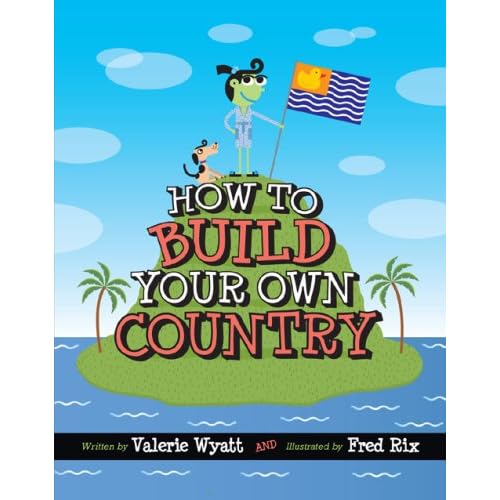
2. How to Build Your Own Country by Valerie Wyatt and illustrated by Fred Rix


This book is one my kids turn to again and again, and is a great resource for me to point them to when they claim to be bored. This book educates kids about all of the different components that are important to the functioning of a country and invites kids to create their own fictional country along the way. Kids learn about writing a national anthem, setting up a government, declaring holidays, creating foreign policy, and much, much more. The text is peppered with real-world and fictional examples and has great illustrations. As a result of owning this book, I am now a citizen of the United States, Masketstan, and Halloweenia of Awesomeness, and have three passports to prove it. I was also elected as the first president of Masketstan. 


3. Encyclopedia of Science (multiple authors)


One word best describes this book: comprehensive. It starts with a "How to Read this Book" section that unpacks the structure of each page and provides some pre-reading assistance. After a couple of timelines and information on how scientists work, the book delves into just about every sub-field within science, including human biology, astronomy, geology, meteorology, etc. Within each sub-field, there are single- or double-page spreads on sub-topics, so if a kid has five to ten minutes he or she can open the book and learn about industrial pollution, sound, climates, etc. The end of the book features a "Fact Finder" section that provides some key overviews in graphic format. The illustrations are fantastic. There's a great mix of photographs and diagrams as well as illustrated sidebars that address the history of science or further explain a concept addressed in the main text. I need to read this book myself!


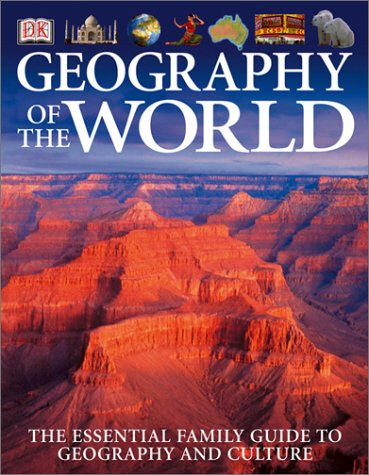
4. Geography of the World (multiple authors)


This book is to geography what the book above is to science. As someone who is passionate about geography (don't laugh!) this book is one of my favorites. So many people think that geography is just about maps, but the reality is that geography is a complex field that addresses all kinds of topics that can be addressed spatially (i.e. anything that can be mapped), including conflict and cooperation, land use, culture, etc. Similar to the Encyclopedia of Science, this book begins with a section on "How to Use This Book." Following that are some overview pages with thematic maps on larger topics, such as climate and population. From there, the book delves into a continent by continent look at geography. Each section begins with a "Peoples of.." section, followed by country profiles. These profiles are rich with interesting and varied topics, from agriculture in Canada to Islamic cities in Uzebekistan to land reclamation in the Netherlands. There's also a sidebar for each country filled with interesting statistics. The book ends with more overview  pages, including political systems, world religions, and rich and poor. As with the Encyclopedia of Science, there are amazing visuals that support and enhance the text. 

5. Two books in one here: National Geographic's World Atlas for Young Explorers and United States Atlas for Young Explorers


These two atlases come with a fun bonus: companion web sites where kids can go for more information. These books both start with "How To" pages that describe how to use both the atlas and the web site. What follows are thematic maps, country by country or state by state detail, and additional statistics. 

So...if you've gotten to the bottom here, thank you for reading! I have lots more books I could share and review here, but this is a start. If anyone out there finds this useful, please let me know in the comments and I'll plan to do another post with more books and perhaps a third post with the books I'm planning to buy for my kiddos this holiday season.

Happy reading!


Related Posts with Thumbnails